This blog may contain Amazon, Shop Your Likes, or other affiliate links. I’ll get a small commission if you make a purchase after clicking one of my links, but your price won't change. Complete Disclosure statement here.

Wrapping Christmas presents can be quick and easy when you follow these 5 steps. All of my gift wrapping supplies came from Walmart. Their Holiday Time collection has adorable gift bags, pretty wrapping paper, along with gorgeous ribbons and bows.
I’ve been wrapping gifts since I was a little girl growing up on South Main Street in Bentonville, Arkansas (home of Walmart). It was an honor to work at the Corporate Office as a teenager.
Now I’m all grown up living in Nashville with a beautiful family of my own who helps me with the gift wrapping. You are in for a treat! My husband, Chuck, and sons, Brandon and Baron, are going to show you how fun wrapping can be. Watch my latest video with these awesome men in my life:
How to Wrap a Christmas Present with Gift Wrap
Wrapping paper is ideal for boxed gifts. For odd-shaped gifts, or when I’m in a rush, gift bags are my preferred choice. Walmart has a beautiful selection of gift wrap. It’s fun to mix and match colors and designs. I love sparkly Christmas wrap, so the more glitter the better! Follow these easy steps for a wrapped gift that will make even your momma proud.

Step 1 – Measure Your Gift Wrap
First, select the prettiest wrapping paper you can find. Then unroll your paper and place your gift upside down. Pull enough wrapping paper to overlap the gift 2-3 inches. I prefer using a 24″ metal ruler with cork backing to tear the wrap (as shown in the video above). Next turn your gift the other direction, and measure gift wrap so it covers the ends about two-thirds a way up the side, then tear or cut off the excess. Get just the right amount of paper so you don’t have too much overlap, or the paper will look bunchy.
Step 2 – Add the Tape
I love using a weighted tape dispenser to make this step easier. You can use either regular gift wrap tape or double sided if you don’t want the tape to show. Start by folding down one edge of the wrap about a 1/2″. Bring the gift wrap together in the middle, pull tight, and overlap the side with the folded edge. Tape the center with one or two pieces of tape.
For the ends, fold the sides of the gift wrap inward so they are flush with the box. Then crease the paper in a triangular fashion. Fold the top tab of paper up tightly, and then tape to the box. Fold the edge of the bottom tab about a 1/2″, then bring it up pulling tightly. Tape bottom tab to the middle of the box end. Repeat this step on the other end.
Step 3 – Crease Top Edges
Give your gift a finished look by creasing all the edges along the top by pinching the paper together with your fingers.
Step 4 – Add Ribbon or Bows
Walmart has so many gorgeous ribbon options these days from red velvet, sparkly metallic colors, buffalo plaid, and more. You can tie a simple bow using wired ribbon, and by trimming the ends in a diagonal or “V” cut, your gift looks amazing.
For easy peel and stick bows, the Holiday Time brand has premium assorted bow sets to make all your Christmas presents look extra special and unique.
Step 5 – Add a Touch of Whimsy

It’s always fun to add a little something to make the recipient of your gift smile by adding something whimsical. Walmart has a huge collection of ornaments between $1-$2 that can be personalized to coordinate with your wrapping paper. Another sweet option are Walmart’s clip-on poinsettia flowers, pinecones or birds. So, tie on the whimsy, or a fun gift tag, or both!
How to Wrap a Christmas Present with a Gift Bag
A cute gift bag is ideal when wrapping odd-shaped presents. Walmart has a wonderful selection that will appeal to young and old alike. Follow these simple steps to make your gift look like it was put together by a professional gift wrapper.

Step 1 – Select the Proper Size Gift Bag
Make sure the gift bag will work with the size gift you have selected. You can choose bags in different heights and widths. For example, in our video above, we needed a wide bottom gift bag to wrap our basketball. Walmart had the perfect one!
Open your bag, and place the gift carefully inside. If your bags have the clear plastic hang tabs at the top, you may want to cut those off.
Step 2 – Correctly Add Tissue Paper
I say “correctly” because most people have never been taught how to add tissue to a gift bag. It’s a very simple technique. Grab a piece of tissue paper from the center with your fingers. Then do a simple swirl of your wrist so all the point stand up. Then place the tissue in your bag and make sure all the points stand up. Add two or three sheets of tissue for small and medium bags, and more for larger bags. For larger bags, to keep your tissue from sinking down, add filler paper like grocery sacks or newspaper, then add the tissue so it stands up out of the bag.
Step 3 – Accessorize with Ribbon, Bows, Gift Tags & All Things Whimsical
To take your gift bag to the next level you can add a bow to the top corner or tie a ribbon to the handle. I love to add a touch of whimsy like I mentioned in the gift wrap tip Step 5 above. Some gift bags come with a gift tag already. If they do not, it always great to include a gift tag. Walmart’s Holiday Time brand has lots of great options for these.
How to Wrap a Christmas Present with a Gift Box

One of the easiest ways to wrap a Christmas gift quickly is by using a gift box or apparel box with holiday prints. You don’t have to add gift wrap. Also, they are are perfect for odd-shaped gifts. Simply follow these easy steps:
Step 1 – Select the Proper Size Gift Box
Make sure the gift box will work with the size gift you have selected. You can choose boxes that are plain white or kraft or with printed designs. Walmart has fun pre-packaged Christmas designs in both apparel and gift box assortments. They also sell single boxes made from more rigid cardboard which are ideal when looking for something reusable.
Step 2 – Wrap Your Gift in Tissue
Add tissue paper to protect your gift by wrapping the item with tissue and wadding up additional pieces of tissue around the sides so it doesn’t rattle. If you are wrapping apparel or linens, you’ll want to make the presentation prettier by folding a flat piece on the bottom and the top of the gift.
Then add the lid. You may or may not want to tap the top and bottom pieces of the lid for the less rigid boxes to make them hold together better.
Step 3 – Accessorize with Ribbon, Bows, Gift Tags & All Things Whimsical
I love taping a ribbon around my gift boxes because they not only look spectacular with ribbon, but it also keeps the lid on better. One of my favorite things to do with gift boxes is to stack different sizes on top of each other to make a gift tower. It makes for a stunning presentation when you have more then one gift. Adding ribbon to keep these in place is a must!
Gift boxes are made for adding a touch of whimsy. Adding an inexpensive ornament just elevates the gift to the next level. Remember to include a coordinating gift tag.
Why Even Bother to Wrap Anyway?
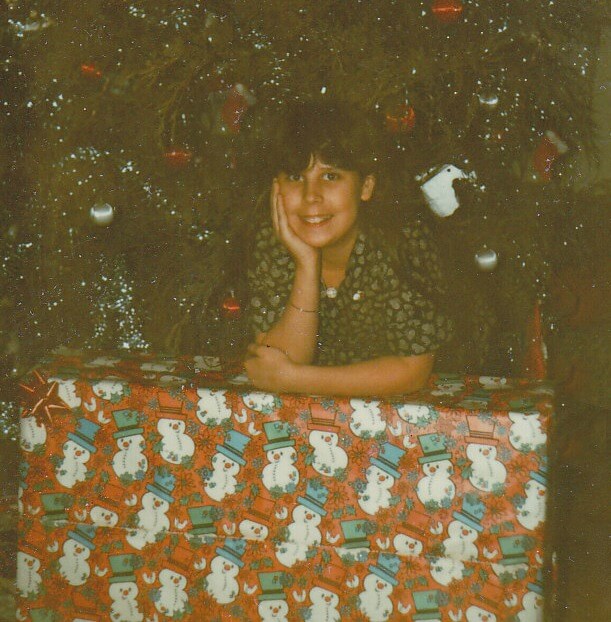
When I look back at many of my old photos, they involve gift giving and receiving. So why do we even bother to wrap?
The excitement and suspense and surprise makes it all worth it.
Taking the time to wrap a pretty gift shows honor to your loved one. Showing hospitality and gift-giving is one of my 7 Steps to a Lovely Home.
Finally, wrapping is a fun way to express your creativity!

So head to Walmart and load up on their wrapping supplies. Get your family involved in the wrapping. The gifts don’t have to be perfectly wrapped. It’s not about that at all.
It’s about sharing and giving love in all of life’s precious moments.
Our family wishes yours a Very Merry Christmas full of love, peace and joy!
I’m here for YOU! Send your decorating questions to buffie@buffieshomedecorating.com.
Much love & joy,

Get my Decorating Guides:
How to Set a Lovely Table in 7 Joyful Steps
How to Hang an Ancestry Gallery Wall
7 Things The Property Brothers Taught Me About Home Decorating